




Short answer
A vapor barrier is a Class I vapor retarder of 0.1 perm or less, such as polyethylene sheet, foil or steel, placed on the warm side of insulation. Under a concrete slab use a 10–15 mil (0.25–0.38 mm) sheet with 150 mm (6 in) taped laps directly beneath the concrete; in cold rooms the panel's outer steel skin is the barrier.
Key takeaways
- Class I vapor retarders are 0.1 perm or less, Class II 0.1–1.0 perm and Class III 1.0–10 perm.
- Commercial slabs need a 10 mil (0.25 mm) or thicker ASTM E1745 vapor retarder placed directly under the concrete; 6 mil suits basic residential slabs.
- Overlap slab vapor barrier seams by at least 150 mm (6 in), tape every seam and penetration, and repair punctures before the pour.
- In cold climates the wall vapor barrier goes on the inside; in hot, humid climates interior polyethylene should be avoided.
- In a cold room or −18 °C (0 °F) freezer the warm side is outside, so the outer panel skin and sealed outside joints form the vapor barrier.
- Closed-cell spray foam reaches about 1 perm at 50 mm (2 in); open-cell spray foam is not a vapor barrier.
What is a vapor barrier?
A vapor barrier is a sheet, coating or facing that stops water vapour diffusing through a floor, wall or roof, measured by its permeance in perms. Building codes call the very tight materials (0.1 perm or less, such as 6–15 mil polyethylene, aluminium foil and sheet steel) Class I vapor retarders, and the term "vapor barrier" is normally reserved for them.
Water vapour always moves from the warm, humid side of an assembly to the cold, dry side. If it reaches a surface below its dew point, it condenses, soaking insulation, rusting steel, lifting floor coverings and, in a freezer, forming ice inside the insulation.
Three things are often confused with it:
- Moisture barrier: a loose trade term for any layer that keeps water out. Under a slab it usually means the same polyethylene sheet; on a wall it may mean a water-resistive barrier.
- Water-resistive barrier (WRB): house wrap or building paper behind cladding. It sheds liquid rain but is deliberately vapour-open so the wall can dry outwards.
- Air barrier: any continuous layer that stops air leaking through the envelope. Air leakage carries far more moisture than diffusion, so a vapor barrier with open joints does little.
Vapor retarder classes and perm ratings
Vapor retarders are graded by permeance: Class I is 0.1 perm or less, Class II is above 0.1 up to 1.0 perm, and Class III is above 1.0 up to 10 perm, as defined in the International Residential Code and IECC. One US perm equals about 57 ng/(s·m²·Pa); lower numbers mean tighter.
| Material | Typical permeance | Class | Where it is used |
|---|---|---|---|
| Steel or aluminium skin of a sandwich panel | ≈ 0 perm | Class I | Cold rooms, freezer stores, insulated buildings |
| Aluminium foil facing on PIR board | < 0.05 perm | Class I | Walls, roofs, under-slab (with taped joints) |
| Polyethylene sheet 6 mil (0.15 mm) | ≈ 0.06 perm | Class I | Under slabs, crawl spaces, interior walls in cold climates |
| Polyethylene or polyolefin 10–15 mil (0.25–0.38 mm) | 0.01–0.04 perm | Class I | Under slabs that will receive flooring |
| Closed-cell spray foam, 50 mm (2 in) | ≈ 0.8–1.0 perm | Class II | Walls and roofs, irregular surfaces |
| XPS foam board, 25 mm (1 in) | ≈ 1.0–1.5 perm | Class II/III | Foundations, floors, exterior insulation |
| Kraft-faced batt insulation | ≈ 1 perm | Class II | Timber-frame walls |
| Latex paint on plasterboard | 2–10 perm | Class III | Mixed-climate interiors |
| Open-cell spray foam, 100 mm (4 in) | ≈ 10 perm or more | Vapour-open | Not a vapor barrier |
Values are typical published ranges; the real figure depends on product, density and thickness, so always check the data sheet. Note that foam board becomes tighter as it gets thicker: 50 mm (2 in) of XPS is roughly half the permeance of 25 mm.
Why does a concrete slab need a vapor barrier?
A concrete vapor barrier stops ground moisture rising through the slab, where it would damage flooring, adhesives and anything stored on the floor. Soil under a building is almost always at close to 100% relative humidity, and concrete is porous, so without a sheet beneath it the slab keeps wicking water upwards for its whole life.
The damage shows up as lifted vinyl, mouldy carpet, failed epoxy coatings and musty air. That is why a moisture barrier for concrete floor slabs is standard practice for any interior slab on grade, not an optional extra.
What thickness of vapor barrier goes under concrete?
Codes for houses typically accept a 6 mil vapor barrier for concrete slab work (0.15 mm polyethylene), but for commercial slabs and any slab that will receive moisture-sensitive flooring, ACI 302.1R guidance calls for a vapor retarder at least 10 mil (0.25 mm) thick, and the material should meet ASTM E1745. Thin 6 mil film tears easily under rebar chairs, boots and concrete buggies, and every puncture is a leak.
| Sheet | Thickness | Puncture resistance | Typical use |
|---|---|---|---|
| Polyethylene film | 6 mil (0.15 mm) | Low | Residential slabs, garages, crawl spaces |
| Polyethylene or polyolefin, ASTM E1745 Class C | 10 mil (0.25 mm) | Moderate | Light commercial slabs |
| ASTM E1745 Class A / B membrane | 10–15 mil (0.25–0.38 mm) | High | Commercial floors, warehouses, cold stores |
| Reinforced membrane | 15–20 mil (0.38–0.5 mm) | Very high | Heavy traffic during placing, radon control |
Where does the vapor barrier go in a concrete slab?
The vapor barrier in concrete slab construction sits directly under the concrete, on top of the compacted granular base or on top of any under-slab insulation. ACI 302.1R recommends placing it directly beneath the slab when the floor will be covered with moisture-sensitive finishes, because a layer of sand between sheet and concrete holds water that later has to dry up through the slab.
How to install a vapor barrier under a concrete slab
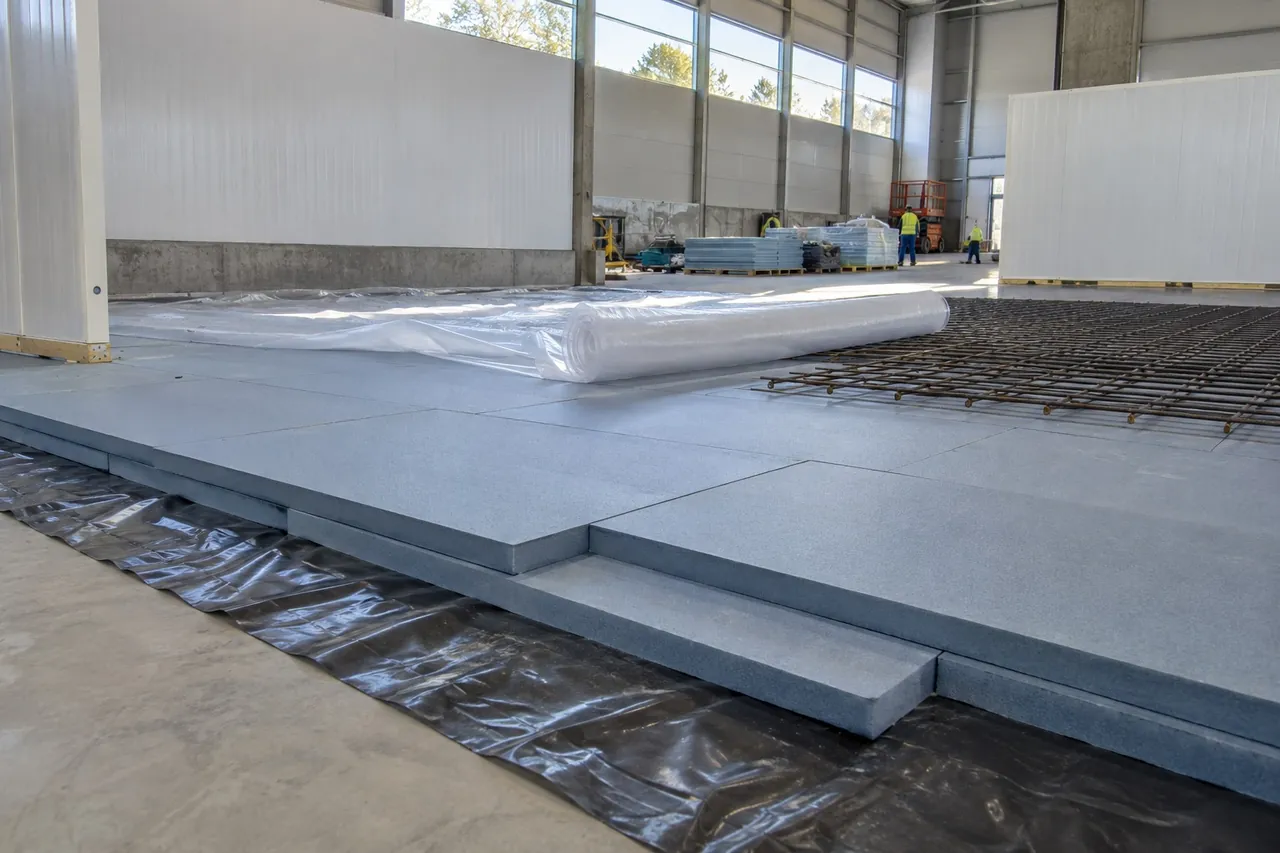
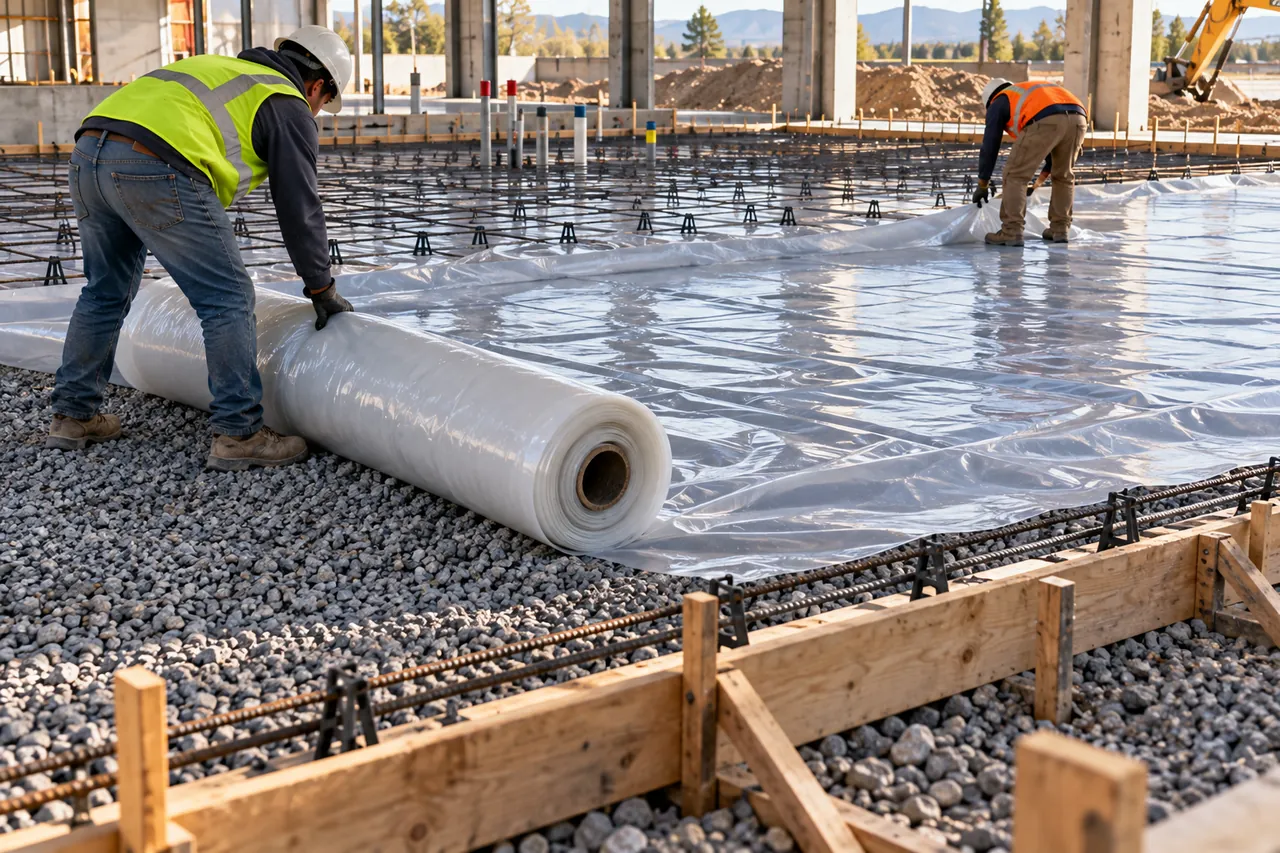
To install a vapor barrier under a new concrete slab, lay a 10–15 mil sheet over a smooth, compacted base, overlap seams by at least 150 mm (6 in), tape every seam and penetration, turn it up the perimeter, and repair every puncture before the pour. ASTM E1643 covers the full installation practice.
- Prepare the base. Compact the granular fill and remove sharp stones, so the sheet lies flat without being punctured.
- Roll out the sheet. Run it in the direction of the pour so the concrete flows over laps rather than into them.
- Overlap and tape. Overlap edges by 150 mm (6 in) minimum and seal with the tape the membrane maker specifies.
- Seal penetrations. Wrap pipes, drains and column bases with a boot or collar of the same membrane, taped to the pipe.
- Turn up at the edges. Carry the sheet up the inside of the footing or perimeter insulation and seal it to the wall.
- Protect it. Use rebar chairs with wide feet and walk boards; patch any tear with a piece extending 150 mm (6 in) beyond the damage.
- Inspect before pouring. A torn sheet cannot be fixed once concrete is on it.
Testing before flooring goes down
Even with a barrier, new concrete holds construction water that takes months to dry. Flooring installers test with ASTM F2170 in-situ relative humidity probes (many floor coverings require 75–85% RH or less) or ASTM F1869 calcium chloride tests (often 3 lb per 1,000 ft² per 24 h, about 1.4 kg per 100 m², or less).
How to install a moisture barrier on an existing concrete floor
To install a moisture barrier on a concrete floor that is already built, lay a 6 mil polyethylene sheet or a foil- or film-faced underlayment on top of the slab, overlap and tape the seams, and run it 50–100 mm (2–4 in) up the walls before trimming under the skirting. This protects floating floors, timber subfloors and carpet from moisture coming through the slab.
- Laminate and engineered wood: use a vapor barrier underlayment for concrete floor slabs, either combined foam-and-film or separate 6 mil poly under foam.
- Carpet: a moisture barrier under carpet on concrete is usually a film-backed pad; never trap moisture under a timber batten floor without a sheet beneath it.
- Tile: tile bonds directly to the slab, so a vapor barrier for tile on concrete is a liquid-applied or sheet membrane rated for tile, not loose poly.
- Glue-down vinyl and epoxy: use a moisture-mitigation epoxy primer if RH tests are high.
For a concrete subfloor moisture barrier under a new timber floor in a basement or garage, the better build is sheet poly plus rigid XPS board, then the subfloor. The XPS keeps the floor surface warm, which removes the cold surface that causes condensation. See our guide to basement and foundation insulation with XPS for thicknesses.
Where does a vapor barrier go on a wall?
On a wall, the vapor barrier goes on the warm side of the insulation, which is the inside face in cold climates and is often omitted in hot, humid climates. The aim is to stop indoor or outdoor humid air reaching the cold sheathing where it would condense.
In the IRC and IECC, timber-frame walls in climate zones 5–8 and marine zone 4 need a Class I or II vapor retarder on the interior side; zones 1–3 should not use interior polyethylene, because summer air conditioning makes the inside the cold side and moisture would condense behind the sheet. Mixed climates usually use Class III (paint) or a "smart" retarder whose permeance rises in humid conditions.
Exterior wall vapor barrier and continuous insulation
An exterior wall vapor barrier on the outside of the studs is risky in a cold climate unless there is enough insulation outside it, because the sheet then sits at the cold face and traps moisture. The correct exterior wall vapor barrier detail uses continuous rigid insulation outside the sheathing: foil-faced PIR or XPS keeps the sheathing above dew point, the foam's taped joints act as the vapor and air control layer, and the wall dries to the inside. Our continuous exterior insulation guide gives the minimum foam thickness by climate zone.
How to install a vapor barrier on an exterior wall
- Fit the insulation fully in the stud cavities with no gaps.
- Staple 6 mil polyethylene to the inside of the studs, starting at the top, with 150 mm (6 in) laps over studs.
- Seal laps with acoustical sealant or tape, and seal to the floor and ceiling sheets.
- Cut tight around electrical boxes and seal with box hoods or tape.
- Install the plasterboard; repair any tears before it goes on.
How to attach a vapor barrier to a concrete wall
For basement and foundation walls, avoid stapling poly straight onto concrete with timber studs and batts in front: the concrete stays cold and wet, and moisture gets trapped. The better approach is to bond 50 mm (2 in) or thicker XPS or foil-faced PIR board directly to the wall with foam-compatible adhesive, tape the joints and frame inside it. If a separate sheet is required, fix it with adhesive and concrete nails through a timber batten at the top, and seal the bottom edge to the floor sheet.
Cold room vapor barriers: why the warm side is outside
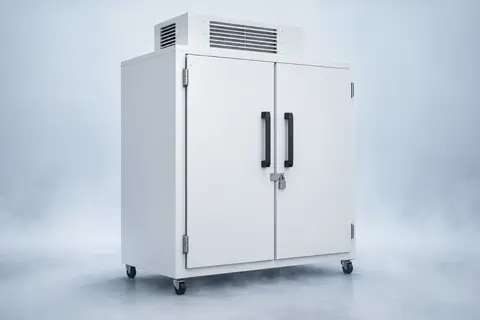
In a cold room or freezer the vapor barrier goes on the outside face of the insulation, because the outside air is the warm, humid side all year. Vapour drive is always inwards, towards the −18 °C to −25 °C (0 °F to −13 °F) room, and a freezer wall can pull several litres of water into its insulation each year if the warm side is not sealed.
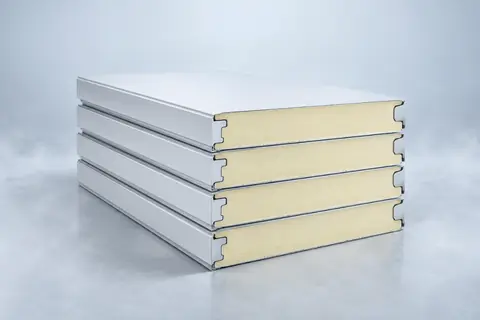
This is the main reason cold stores are built from PU/PIR sandwich panels rather than framed walls. Both steel skins are effectively zero-perm, so the panel face itself is the vapor barrier. The weak points are the joints: cam-lock or tongue-and-groove joints, wall-to-ceiling corners, door frames and pipe penetrations.
| Building type | Warm side | Vapor barrier position | Key detail |
|---|---|---|---|
| Heated building, cold climate | Inside | Inner face of insulation | Seal laps and boxes |
| Air-conditioned building, hot humid climate | Outside | Outer face, or vapour-open walls | No interior polyethylene |
| Cold room or chiller 0 °C to +5 °C | Outside | Outer skin of panel | Seal outside joints with sealant |
| Freezer −18 °C to −30 °C | Outside | Outer skin of panel and under floor insulation | Seal joints, heat the floor, heater cables at door |
Sealing panel joints
- Apply non-hardening sealant on the warm (outside) face of every joint and silicone on the inside for hygiene.
- Seal the wall-to-floor junction and fit a coved or angle trim.
- Seal around every pipe and cable penetration on the outside face, ideally with a sleeve.
- Never leave screw holes in the outer skin unsealed.
Freezer floor vapor barrier
A freezer floor needs a vapor barrier on the warm side too, which is underneath. The usual build is base slab with underfloor heating, a 0.2–0.25 mm (8–10 mil) polyethylene sheet with taped laps, 100–150 mm (4–6 in) of XPS foam board in staggered layers, a slip sheet and a reinforced wearing slab. Our under-slab insulation guide covers floor heating and frost heave in more detail.
Under house and crawl space vapor barriers
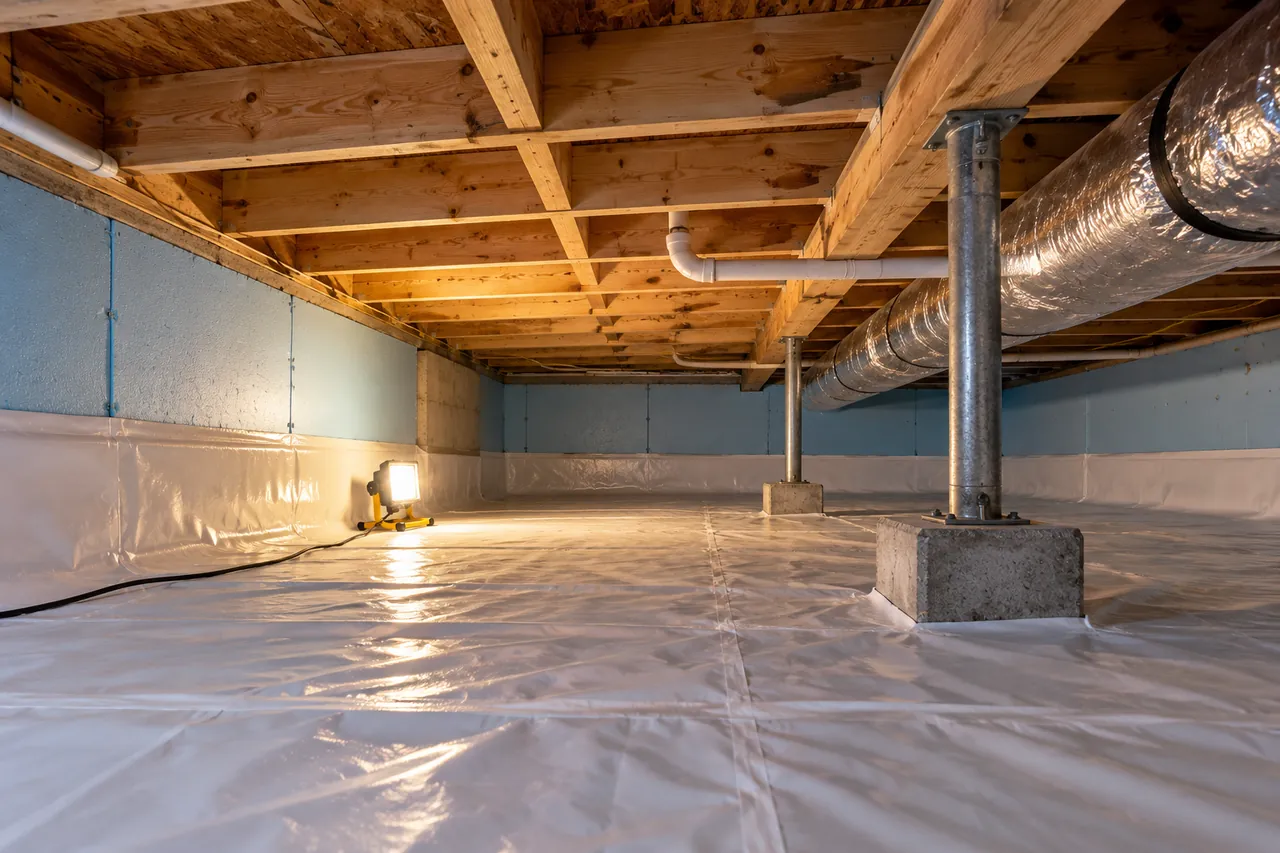
An under house vapor barrier is a polyethylene sheet laid over the soil of a crawl space to stop ground moisture evaporating into the space and the floor above. Use 6 mil (0.15 mm) as a minimum and 10–20 mil (0.25–0.5 mm) reinforced sheet when people will crawl over it, with 300 mm (12 in) overlaps taped and the edges run up the foundation walls.
Sealed ("encapsulated") crawl spaces then insulate the walls with rigid foam rather than the floor above. See our crawl space insulation guide for wall foam thickness and drainage details. The same principle applies to an under home vapor barrier in a portable building or container structure on piers: seal the ground, then insulate.
Common vapor barrier mistakes
Most vapor barrier failures come from gaps and wrong placement, not the wrong material.
- Two vapor barriers. Poly on the inside and foil-faced board or a vapour-tight membrane on the outside traps moisture between them.
- Interior poly in hot, humid climates, where the inside is the cold side in summer.
- Untaped laps and penetrations. A 1% gap can let through more moisture by air leakage than the rest of the sheet by diffusion.
- Sand over the sheet under a slab, which stores water that later comes up through the floor.
- Unsealed outside joints on cold room panels, leading to ice in the joint, frost on the inside skin and eventually delamination.
- Relying on open-cell spray foam as a vapor barrier. It is vapour-open; a spray foam vapour barrier needs closed-cell foam at about 50 mm (2 in) or more. Our spray foam vs rigid foam board guide compares the two.
How to choose the right vapor barrier: checklist
Choose a vapor barrier by finding the warm side of the assembly, then picking a material with the right perm class and a way to seal every joint.
- Slab on grade: 10–15 mil ASTM E1745 sheet directly under the concrete; 6 mil only for basic residential or garage slabs.
- Existing slab with new flooring: 6 mil poly or a film-backed underlayment for floating floors; a tile-rated membrane for tile; test RH first.
- Framed wall, cold climate: Class I or II on the inside; in hot humid climates, none on the inside.
- Exterior insulation: foil-faced PIR or XPS with taped joints, thick enough to keep the sheathing warm.
- Cold room or freezer: metal-faced sandwich panels with sealed outside joints, a sealed floor sheet under XPS, and heater cables at freezer doors.
- Never create two vapour-tight layers on either side of the insulation.
For a cold room, the panel and floor build decide whether moisture ever gets in. Our step-by-step walk-in cold room build guide shows the sealing sequence, and the cold room load calculator sizes the refrigeration once the envelope is fixed.
Be There supplies metal-faced PU and PIR sandwich panels from 50 to 200 mm thick for cold rooms and insulated buildings, foil-faced PIR insulation boards for walls and roofs, and XPS board for freezer floors and foundations, along with joint sealant and trims for complete walk-in cooler and freezer kits. We do not sell polyethylene sheeting, but our engineers will tell you where it belongs in your build. Send your room size, temperature and floor details through the inquiry form and we will quote FOB, CIF or DDP.